Tuesday 29 July 2014

Gardening Plans

The most overwhelming part of the renovation has definitely been tackling the garden and also trying to the design the garden. Our house doesn't have the standard backyard, we actually have a front courtyard that needs the most work. We plan on creating a simple garden with low-maintenance plants and a large deck for entertaining.

The plan is to:
1. Spray and weed the entire area
2. Put a weed mat down
3. Remove the weird sculpture at the front
4. Paint the retaining wall
5. Lay a deck
6. Put in fake grass on the left hand side
7. Put in low maintenance plants around the border

Thursday 15 May 2014

How to demolish a bathroom

The first thing to check before demolishing the bathroom is whether or not there there is asbestos present, as in the 60's/70's it was very common for it to be found in the cement walls in wet areas of houses. We found asbestos in the roof of the bathroom as well as some of the walls so had to get a professional company to come and remove it, which wasn't cheap, but it is absolutely necessary to get someone else to remove it!

Guest Post: Finding the potential in your home

One of my good friends has gone through a similar renovating process with her fiance and have designed and renovated their home beautifully, she has also provided us with a number of useful tips and suggestions when we went through the renovation process ourselves. I asked her to share some of her experiences, challenges and she talks a lot about finding the potential in your home.

By Claire Butler

Three years ago my partner and I bought a house in Weston Creek. It was a house that turned a lot of buyers off because they couldn't see its potential. They couldn't look past the bright coloured walls, the dated bathroom and laundry (including a bright pink toilet) and the three different flooring's (carpet, tiles and vinyl).

Monday 12 May 2014

How to Renovate a Kitchen

The Kitchen Renovation was definitely the biggest part of our renovation process. We started the process in September and it wasn't finished until January. One of the best piece of advice I could give about the kitchen is to START EARLY! 

We thought about a number of options for the kitchen renovation, including buying flat packed cabinetry from Bunnings or Masters. The quality looked good but it was the start of our renovation process and didn't trust that we had enough skills to be able to put it together and for it to look professional. We ended up going through Good Guys Kitchens and had an initial meeting with an interior kitchen designer which was really helpful. She measured up everything and helped us plan the layout and design of the kitchen. Final plans are below.


The original kitchen had a half pantry wall in the middle of it, with black slate floor and beaten up cupboards.

Thursday 8 May 2014

How to level a concrete floor

The original floor in the kitchen/dining area was a black slate floor. Whilst I think slate can look really nice in some houses, ours was splattered in white paint stains and it only went into the kitchen, not throughout the living room area. So when we decided to remove the wall to make it open plan, I wanted to use the same flooring throughout the kitchen and living room to create a flow throughout the house.

So the first thing to go was the slate flooring! After drilling up the flooring, there was concrete bumps all over the floor and as we wanted to lay laminate flooring on top of this it would have been uneven and it needed leveling. And your final finished floor will only be as good as the sub floor under it!

If you need more information, this video from the Ultimate Handyman was also great help for us when trying to level the floor, youtube is a great resource for Renovating Rookies!


You will need:

Sunday 4 May 2014

Costing Photos

The photos below are just a couple of many that helped us to budget our renovation costs, they are from a range of shops around Canberra. However, the majority were taken at Bunnings & Masters as we could get a good indication of a lot of product costs in the two stores. As discussed in the post on budgeting, use these photos to plan and budget your Reno in the spreadsheet.

You might think its a waste of time to go around taking photos when you could be getting stuck into the project but before settlement date is a great time to start doing your research. It will give you a good idea of how much you are in for. Always overestimate on your spreadsheet how much things will cost as you can see below for the amount we paid usually ended up being more than the costs indicated in the photos.

Paint - Roughly $150 per 10 L

Wednesday 30 April 2014

Progress photos

I realised I hadn't posted any after photos so here are a couple so far!

Bathroom

Kitchen & Dining Room

Tuesday 29 April 2014

Selecting heating/cooling

Selecting heating and cooling for your house is a big decision that has an impact on both the value of your house as well as determining how much it will cost you in utility bills.

The two big players in the game are split system or ducted systems. Before I started I didn't really understand the difference so here is a brief overview of  what they are about.

Split System

(Info from Lookforthetick)
The most common residential split-system air conditioner is an air conditioning unit made up of two units — an outside unit, the compressor, and an inside air outlet unit, usually referred to as the “wall hung head unit”. The two units are connected by pipes that carry refrigerant. An alternative to the standard unit is the multi-split system, which has multiple indoor units connected to a single outdoor unit. A split-system air conditioner can be used for cooling and heating.

Thursday 10 April 2014

How to lay laminate flooring


Laying laminate flooring yourself is a great way to save money on your Reno. Paying someone to lay your floorboards can cost upwards of $2000. We bought these floorboards from Masters at a reasonable price and had a builder friend show us how to lay them properly. A tip when buying your flooring, look for thicker and wider boards, they are easier to work with and it means you don't need to lay as many! The thicker the boards (ours of 12mm, standard is 8mm thick) the better the acoustics, especially in open plan living areas. You also save money on underlay as you won't need premium underlay if using thicker boards.

Tools required:

Monday 7 April 2014

It's the little things...

Here's my list of 5 small and inexpensive changes that have big impact in a home renovation: 

1. Fresh paint - This is a change that is both cost effective and produces immediate results to both the look and feel of a room.  

How to budget for your reno

The most important factor in renovating is how much money you have to spend on the renovation. Once you have identified this amount, you then need to decide how you are going to spend the money, and look at how far it will allow your project to go.

Before we got the keys to our house, we scoped out our project  and came up with a list of costs to make a budget for the renovation to make sure we knew how much we could do with the funds we had.
This is the budgeting process we used:
1. Walk-through of your home and identify the projects and renovations that you would like to do.

Thursday 3 April 2014

To move or not to move?


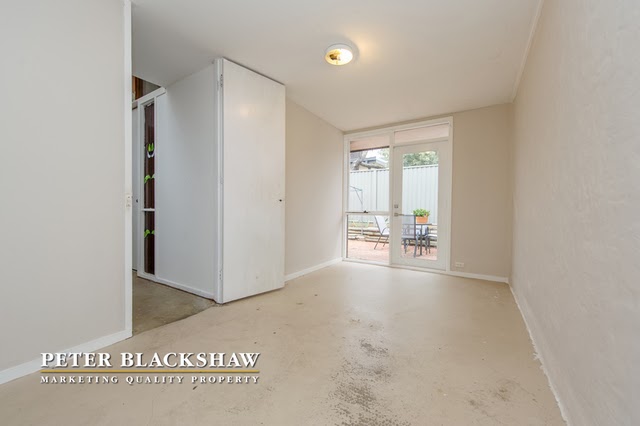
One of the big questions for most renovators is whether or not they should live in the house they are renovating or move out. For us we didn't have a choice, the house was unlivable - no working bathroom, kitchen or floors so living there was not an option.


The biggest factor in determining this is what sort of renovations you are planning on undertaking, for example, renovating your en suite while you have a working bathroom is not something that you will need to move out for. But if the scope of your project is long term and will require numerous rooms to be looked at it might just be worth moving out to save yourself the stress alone. A number of people find that the stress of renovation doesn't come from the actual work itself, it is
from the feeling of living in a state of chaos for a number of months.

Another important factor to consider is financial security, do you have enough money to be able to move out of your house while you renovate? There are a number of costs associated that would normally have to pay for once, but you will be need in both places for the time of the renovation. This can include things such as rent, utilities, transport between the two places, plus essentials that you will need at both houses - food, water, toilet paper, coffee etc.


In the end it is a personal decision of whether you can afford the cost of temporary accommodation, or whether the stress of living in chaos for the duration of the renovation is worth it to save the money. Personally I'm glad we were unable to live in our place when we renovated, as I don't think I could deal with not having all my creature comforts of home!

Monday 17 March 2014

The best tool in the biz


We SHOULD have bought this stud finder on our first day of renovating, turns out we didn't actually buy it until we had put a number of unnecessary holes in both the walls and ceiling of our house. It is definitely a must for renovators, especially if you are putting your own down lights in. 


Stanley Stud Finder


It basically helps you find the wood studs behind your drywall, so that you know where you can and can't secure things and put holes. For example it would have came in handy when making holes for the down lights, as you can't put holes through studs, this would have made our life a lot easier and we wouldn't have had so much patching to do!

You place the tool against the wall and it will give you a visual and/or audio notification such as a beep when a stud is located. Which makes it super easy to find a stud and then nail or screw to it if necessary. We used it find the studs in the wall so we knew where to nail skirting boards too.

We bought this the Stanley Stud Sensor, Model #STHT77404 - only $29.95 from Bunnings Warehouse.

Wednesday 5 March 2014

Helpful Resources


1. Collins Complete DIY Manual

This book was our Bible for all things renovating.
It was easy to read and had in-depth knowledge on nearly every subject from design, repairs to electricity and plumbing.


2. Bunnings

Our go to place for tools, products and advice was Bunnings. They had a good selection of DIY brochures that helped us plan what we needed to do. The staff are generally pretty helpful about products but be wary about taking all advice.
They do have some good how-to videos on their website though,


3. YouTube

Youtube is full of videos for renovation novices.
Their how-to videos were really helpful for us. Some of the ones we looked at were: How to pave, How to install tap ware, How to lay floorboards.


How to Paint

I know it sounds basic, but had absolutely no idea where to begin with painting or how to paint a room when we first started. We went into Bunnings for a free workshop which gave us painting tips and it was very helpful, highly recommend it! We ended up being the only 2 people in the class so we basically got a tailored course on painting specific to our own house.


What you will need:

  • Electric Sander ( I recommend the Ryobi brand)
  • Sugar Syrup
  • Foam Mop
  • Mop Bucket
  • Small angled edging brush (for cutting in)
  • Rollers - good quality otherwise small brush hairs will be left on the wall
  • Roller trays
  • Mixing stick
Paint:

Depending on which area of the house you are going to paint will depend what type is needed. We did the whole house and needed the following different types of paints.
  • Good quality Primer (For all walls and Ceiling)
  • Flat Ceiling Paint (Ceiling)
  • Top Coat (All walls)
  • Semi-Gloss Paint (Architraves and Doorframes)
  • Kitchen & Bathroom Paint (Mould resistant paint for any wet areas)

Steps to follow:

  1. Sanding! The most ridiculously boring and tedious job you will have to do is preparing the walls before painting. Our walls had dents and bumps everywhere so took a significant amount of time to sand before painting was even thought about. I recommend getting the Ryobi Electric Sander, around $80, but it is so worth it! You will generally need to wait until the dust settles before moving onto Step 2, as it can get really messy if you try and start moving on with dust in the air. Make sure you sand both the walls and architraves.
  2. Wash the walls with Sugar Syrup, this will help clean the walls of dust and grime before painting. A foam mop will be suitable for this job. Wait for this to dry before moving to Step 3.
  3. Cutting in - You will then need to 'cut in' the ceiling, using the primer and the angle brush. Cutting in involves going around the outside edges of the ceiling with the smaller brush as the roller won't reach right up against the walls. 
  4. Using a good quality paint roller, paint the ceiling with primer first, after cutting in start from the light in the room and move outwards.
  5. Once the primer is dry, repeat steps 3 and 4 with ceiling paint
  6. Repeat steps 3 & 4 with primer on the walls & prime the architraves also
  7. Once the wall primer is dry cut in and roller with your wall colour paint. 
  8. Apply second coat of wall paint to walls
  9. Using semi-gloss or full-gloss paint the architraves with a small angle brush.


Thursday 27 February 2014

Before Photos

Photos courtesy of Peter Blackshaw - www.allhomes.com.au 

These photos provide some insight as to what the house looked like when we first bought it, however, they were taken by a real estate agent so they make it look like the house was in a lot better condition that it actually was.


This is the original house plan. We haven't changed anything structural in the house, just removed the abnormal kitchen island structure, which you will see in the photos below.
Original House Plan

Back Patio
Living Room

Bathroom

Bedroom 2

Bedroom 3

Kitchen/Living Area

Dinning Room

Kitchen/Dining Area

Front Patio

Front Patio

Kitchen

Kitchen

Living Room

Entrance/Living Room


Back Patio

Back Patio

Wednesday 26 February 2014

Our House

We bought a house!

It's old and run down with concrete floors, an unusable kitchen, outdated bathroom, looks like a construction site and just about everything needs A LOT of work! But we love it! It is light and spacious and feels like home. Beautiful large windows throughout and mostly open plan design. We bought in September 2013 and since then have renovated nearly the entire house with absolutely no renovating experience! I've started this blog as we really struggled with finding useful DIY tips and renovation how-to's going for people who have never been through the process. I hope to provide some valuable ideas and share the experience with others about to start on an amazing house transformation!

Enjoy!

                                                       Photo source: allhomes.com.au